How to Install a Cold Plunge Tub in Your Home

Installing a residential cold plunge tub doesn't require a contractor degree or unlimited funds. Whether you're looking for a basic DIY setup or investing in a premium system, the process breaks down into manageable steps that most homeowners can handle themselves. Let's walk through exactly how to set up your cold plunge so you can start reaping the recovery benefits right away.
In this article
- Choose Your Cold Plunge Setup (Budget and Style)
- Pick the Right Location for Your Tub
- Install a Protective Underlayment
- Fill Your Tub and Install the Water Chiller
- Set Up Your Pump and Circulation System
- Establish Your Temperature and Usage Settings
- Maintain Your System for Long-Term Use
- Troubleshooting Common Installation Issues
- FAQs About Cold Plunge Tub Installation
Choose Your Cold Plunge Setup (Budget and Style)
Before you install anything, you need to decide what type of cold plunge makes sense for your space and budget. Your options range from ultra-affordable to luxury.
Related: Red Light Therapy Home Equipment Benefits Explained
Related: Best Light Therapy for Home Wellness in 2026
Related: Best Home Contrast Therapy Systems for 2026
The budget-friendly route starts around $150 with a stock tank—basically a metal livestock watering tub you fill manually and chill with ice. It works, but managing ice constantly gets old fast.
Related: Hot Cold Contrast Therapy: Benefits & How It Works
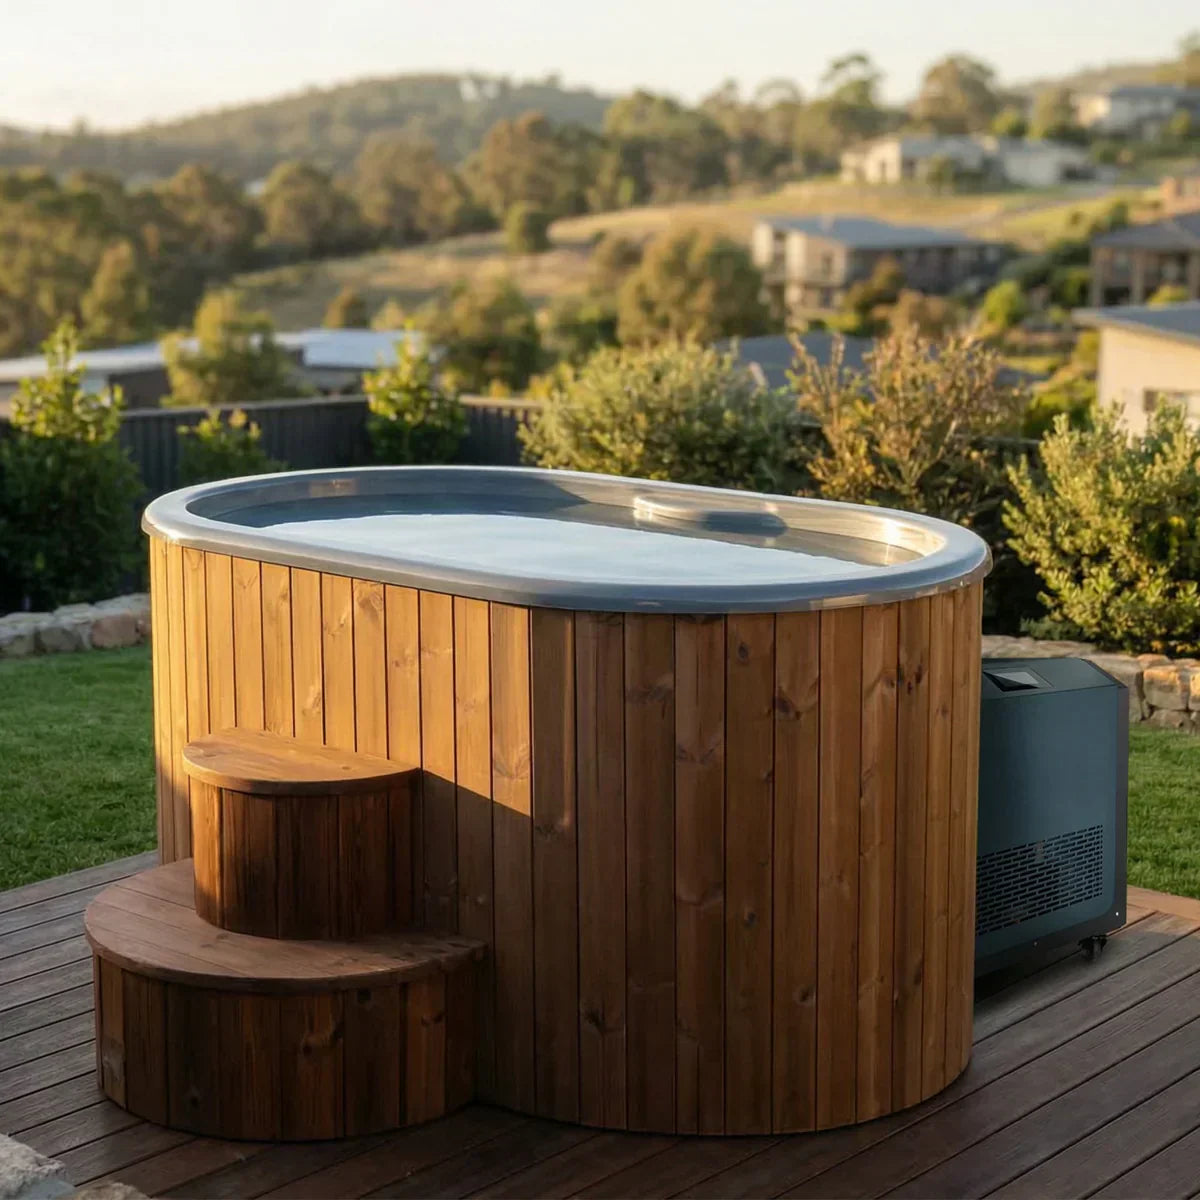
Portable models ($1,000–$3,000) are the sweet spot for most people. They come pre-built, include a water chiller, and require minimal installation beyond unboxing and plugging in. Prime Regeneration carries several compact, technology-forward options in this range that deliver premium features without the industrial footprint.
Premium systems ($5,000–$10,000+) give you advanced controls, sleek finishes, and integrated filtration. These are the statement pieces—luxury recovery equipment that looks as good as it performs.
Pick one that fits your lifestyle and budget. Honestly, even mid-range portable models blow stock tanks out of the water because you're not playing temperature roulette.
Pick the Right Location for Your Tub
Location matters more than people think. You want a spot that's convenient to use consistently but also practical for drainage and electrical access.
Indoor placements (garage, basement, dedicated spa room) keep you shielded from weather and make year-round use easier. Outdoor setups work great in temperate climates, but you'll deal with leaves, temperature swings, and longer chill times in cold weather.
Check your electrical setup. Most cold plunge chillers need a standard 120V or 240V outlet within reasonable distance. You don't want to run a 50-foot extension cord—that's asking for trouble.
Make sure the ground is level and stable. Concrete, composite decking, or reinforced dirt all work. Avoid soft grass or uneven terrain that'll create stress on the tub's seams.
Proximity to a water source is helpful for filling and topping off. A garden hose nearby makes life easier, though you can fill from anywhere if needed.
Install a Protective Underlayment
This step gets skipped too often, and it's a mistake. A high-quality protective mat underneath your tub is non-negotiable if you want longevity.
Use a mat that's at least 50x50 inches—it needs to cover the full footprint of your tub plus some overhang. This protects against ground friction, sharp rocks, and debris that'll puncture or degrade the tub material over time.
Lay the mat flat and smooth out any wrinkles before placing the tub on top. Think of it as an insurance policy for your investment. A $100–$200 mat can add years to your equipment's lifespan.
Fill Your Tub and Install the Water Chiller

Once your tub is in place, fill it with regular tap water to about 18–24 inches deep. That's the sweet spot for seated immersion where you can submerge to your shoulders comfortably.
Now comes the chiller—the real MVP of cold plunging. The chiller connects to your tub via intake and return lines (usually included) and maintains your water temperature automatically.
Most systems let you set your target temperature (typically 50–60°F for cold plunging) and the chiller does the work. You can turn it off during off-seasons or low-usage periods to save energy. When you're not using your plunge for a few weeks, kill the chiller and let your utility bill breathe.
Here's the honest take: a chiller is essential if you want consistent, actually-cold water without spending a fortune on ice. Stock tanks without chillers aren't real cold plunging—they're frozen popsicles that lose their chill in 20 minutes.
Set Up Your Pump and Circulation System
Most premium cold plunge packages include a pump as part of the chiller system. The pump moves water through the chiller and back into the tub, keeping the temperature even and preventing stagnation.
Installation is straightforward: connect the intake line to the return port on your tub, run it to the chiller, then connect the outlet line back to the tub. Secure all connections hand-tight first, then use a wrench if needed. You're not trying to crush these fittings—snug is enough.
Prime the pump before your first use by running water through it without the chiller on. This removes air bubbles and ensures smooth operation.
Once everything's connected and water is flowing, fire up the chiller. You'll usually see temperature drops within 30–60 minutes, though premium units chill faster.
Establish Your Temperature and Usage Settings
Most modern cold plunge systems offer programmable temperature controls. You can customize how cold you want to go and set timers for automated on/off cycles.
Beginners typically start at 55–60°F. Your body needs time to acclimate to cold water—jumping straight to 40°F is unnecessary and miserable. Work your way down gradually over weeks.
Set your session length to 3–5 minutes initially. You can dial it up as you get used to it, but there's no prize for staying in longer early on.
If you want expert guidance on setup and premium models that streamline this whole process, Prime Regeneration offers comprehensive resources and authorized dealer support to help you choose and install the right system for your home.
Maintain Your System for Long-Term Use

Installation is one thing. Keeping your cold plunge in top shape requires basic maintenance.
Check water levels weekly and top off as needed. Evaporation happens, especially in outdoor setups.
Clean your filters per the manufacturer's schedule—usually every 2–4 weeks depending on use. Clogged filters force your chiller to work harder and reduce effectiveness.
Test water chemistry occasionally. While cold plunges aren't pools, balanced pH keeps your water fresh and your skin happy. Simple test strips run $10–$20 and take two minutes.
Drain and clean your tub seasonally. Empty it completely, scrub the interior with mild soap, rinse, and refill. This prevents algae and mineral buildup.
Your chiller will tell you when something's wrong—most units have indicator lights or digital displays showing errors. Don't ignore them. A small issue now beats a broken system in January.
Troubleshooting Common Installation Issues
Your water isn't getting cold enough? Check that the chiller inlet and outlet lines are connected correctly. Reversed connections mean water bypasses the cooling entirely. Also verify your target temperature is actually set lower than the current water temp.
Leaking around fittings? Tighten connections gently with a wrench. Over-tightening plastic fittings strips threads. If it still leaks, you may need new washers or tape on the threads.
Pump making noise? Air in the lines usually causes this. Run the system for 10 minutes—bubbles will work out naturally.
Not filling fast enough? Most tubs take 30–60 minutes to fill completely with a standard garden hose. If it's taking hours, your water pressure might be low. That's normal; just plan ahead.
When you're ready to invest in a premium system or need guidance on installation best practices, Prime Regeneration provides authorized dealer expertise and equipment that handles the technical side seamlessly.
FAQs About Cold Plunge Tub Installation
Do I need a professional electrician to install a cold plunge tub?
Not necessarily. Most portable cold plunge units plug into standard 120V or 240V outlets, which means no special wiring. If your outlet isn't within reasonable distance, a licensed electrician can run a dedicated line safely. This costs $200–$500 but ensures everything meets code. For basic setups, you can definitely DIY it.
What's the difference between a portable and permanent cold plunge installation?
Portable units sit on top of the ground, connect to a standard outlet, and can be moved or drained quickly. Permanent installations involve digging, concrete pads, and dedicated plumbing/electrical—way more involved. Portable is the move for 99% of homeowners. It's flexible, reversible, and way less hassle.
Can I use well water or pool water in my cold plunge?
Well water works fine, though you should test it for pH and mineral content first. Pool water? Skip it. Pool chemicals and chlorine levels are way higher than what you want touching your skin for extended periods. Stick with tap water. It's filtered, balanced, and ready to go.
How long does a cold plunge tub usually last after installation?
A quality system lasts 5–10 years or longer with proper maintenance. That protective underlayment, regular cleaning, and filter changes extend the lifespan significantly. High-end units hold up longer than budget options, but even affordable portable setups deliver years of use if you care for them. Prime Regeneration carries equipment backed by manufacturer warranties and U.S.-based support to protect your investment long-term.